Harley-Davidson Instrument Panel Lights: Meanings Fixes
Understanding your Harley-Davidson instrument panel lights is essential for every rider. This guide covers the meanings behind every dashboard warning symbol and provides practical fixes for common problems. You will learn how to troubleshoot electrical issues, interpret warning lights, and keep your motorcycle running safely.
Your Harley-Davidson instrument panel lights speak a language every rider should understand. Those small symbols on your dashboard are not just decorative. They are your motorcycle’s way of telling you something important. When a light comes on, it is trying to communicate a specific message about your bike’s health.
Many riders ignore dashboard warnings until something goes seriously wrong. This approach can lead to costly repairs and unsafe riding conditions. Understanding what each light means gives you the power to act quickly. It also saves you money and keeps you safe on the road. This guide will walk you through every important Harley-Davidson instrument panel light and show you how to fix common problems.
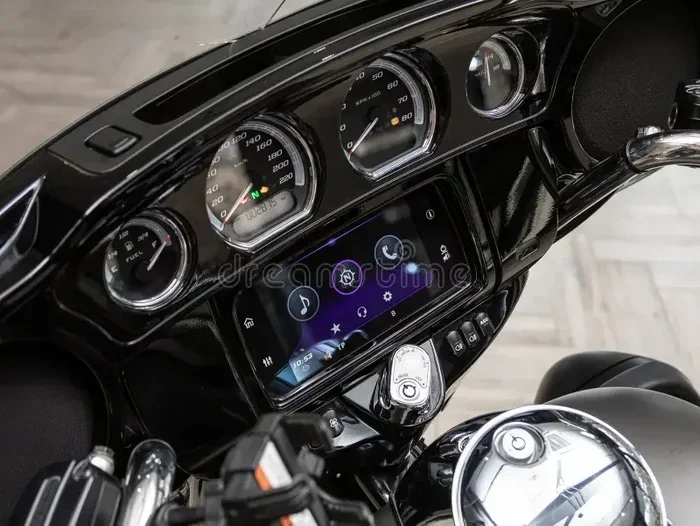
Your motorcycle’s dashboard is more than just a speedometer and tachometer. It is a complex system of indicators designed to protect you and your bike. The instrument panel houses multiple lights that monitor everything from engine temperature to oil pressure. Each symbol has a specific meaning and a specific purpose.
Modern Harley-Davidson models come equipped with advanced warning systems. These systems track dozens of functions simultaneously. When something goes wrong, the corresponding light illuminates on your dashboard. Some lights are minor and easy to fix. Others signal serious problems that need immediate attention.
The instrument cluster on your Harley connects to various sensors throughout the motorcycle. These sensors monitor engine performance, electrical systems, braking, and more. When a sensor detects an issue, it sends a signal to the dashboard. The corresponding light then activates to alert you.
Understanding this system is the first step toward becoming a more confident rider. You do not need to be a mechanic to interpret your dashboard lights. With a little knowledge and some basic tools, you can handle most warning light issues yourself.
Let us break down the most common Harley-Davidson instrument panel lights you will encounter. Each section covers what the light looks like, what it means, and how to address it.
The engine warning light is one of the most recognizable symbols on any motorcycle dashboard. It usually looks like a small engine silhouette. On Harley-Davidson models, this light can indicate a range of issues from minor to serious.
When this light comes on, it means the motorcycle’s computer has detected a problem. The issue could be as simple as a loose gas cap. It could also signal a more serious engine sensor failure. The color of the light matters too. A yellow or amber light usually means a less urgent issue. A red light demands immediate attention.
Common causes for the engine warning light include faulty oxygen sensors, catalytic converter problems, and ignition system failures. In some cases, a loose or damaged gas cap triggers the light. Always check the cap first before assuming the worst.
If the light stays on, do not ignore it. Use an OBD-II scanner to read the error codes. Many auto parts stores offer free code reading services. This simple step can save you hours of guesswork.
The oil pressure warning light looks like an oil can symbol. This is one of the most critical lights on your Harley-Davidson instrument panel. When it illuminates, it means your engine oil pressure is too low.
Low oil pressure can cause severe engine damage within minutes. If this light comes on while riding, pull over safely and turn off the engine immediately. Check your oil level using the dipstick or sight glass. Top off the oil if it is low and restart the engine.
If the light persists after adding oil, you may have a deeper problem. A failing oil pump, clogged oil passages, or a faulty oil pressure sensor could all be responsible. In these cases, a trip to the mechanic is necessary.
Regular oil changes are the best way to prevent this warning light. Follow your Harley’s maintenance schedule and use the recommended oil type. Clean oil keeps the engine lubricated and the pressure at proper levels.
The battery or charging system light looks like a battery icon. This light indicates a problem with your motorcycle’s electrical charging system. When it comes on, your battery is not being charged properly by the alternator.
A dead battery is the most immediate concern when this light activates. Without a charging system, your battery will eventually drain completely. This leaves you stranded and unable to start the motorcycle.
Common causes include a failing alternator, loose or corroded battery terminals, and damaged wiring. Inspect the battery terminals for corrosion and clean them with a wire brush. Check all wiring connections for looseness or damage.
If the alternator is the problem, you will need professional replacement. The alternator charges the battery while the engine runs. Without a working alternator, your Harley will only run on battery power alone.
The ABS brake warning light looks like the letters ABS inside a circle. This light indicates a problem with your Anti-lock Braking System. While your regular brakes will still work, the ABS feature may be disabled.
Common triggers for this light include a faulty ABS sensor, low brake fluid, or a malfunctioning ABS module. Check your brake fluid reservoir first. If the fluid is low, top it off with the correct type recommended by Harley-Davidson.
ABS sensors can get dirty or damaged over time. Road grime and debris can accumulate on the sensor rings. Cleaning the sensors often resolves the issue. If the light persists, a diagnostic scan will reveal the specific error code.
Do not ignore the ABS light, especially if you ride in wet conditions. The ABS system helps prevent wheel lockup during hard braking. Without it, stopping distances increase and control decreases on slippery surfaces.
The temperature warning light looks like a thermometer symbol. This light signals that your engine is running too hot. Overheating can cause catastrophic engine damage if not addressed quickly.
Common causes of overheating include low coolant levels, a faulty thermostat, a broken water pump, or a clogged radiator. Check your coolant reservoir first. If the level is low, add the recommended coolant mixture.
Ride with caution if the temperature light comes on. Reduce your speed and avoid heavy throttle. Pull over safely if the light stays on or gets brighter. Continuing to ride an overheating motorcycle can warp engine components and lead to expensive repairs.
Regular cooling system maintenance prevents overheating issues. Flush and refill your coolant according to the manufacturer’s schedule. Inspect hoses and connections for leaks or cracks regularly.
The turn signal indicator on your dashboard shows which direction your turn signal is activated. It looks like a small arrow pointing left or right. This light should flash when you engage your turn signals.
If the turn signal light stays solid instead of flashing, it usually means a bulb has burned out on that side. Check both the front and rear turn signal bulbs. Replace any dead bulbs with the correct wattage and type.
A faster-than-normal flashing turn signal also indicates a bulb failure. The motorcycle’s flasher unit detects the reduced electrical load from a dead bulb and speeds up the flash rate. This is a built-in safety feature to alert you to the problem.
The high beam indicator looks like a blue headlight symbol. This light stays on when your high beams are activated. It reminds you that you are shining bright lights at oncoming traffic.
If this light stays on when you switch to low beams, the high beam switch may be stuck. Try toggling the switch a few times to see if it resets. If the problem persists, the switch itself may need replacement.
A stuck high beam can blind other drivers and create dangerous riding conditions. Always ensure this light turns off when you switch back to low beams. If it does not, address the issue before riding at night.
The neutral light illuminates when your motorcycle is in neutral gear. On Harley-Davidson models, this light is essential for safety and proper operation. If the neutral light does not come on, it can cause problems starting the bike.
Common issues include a faulty neutral switch, wiring problems, or a misadjusted shift linkage. The neutral switch is located near the transmission and detects when the transmission is in neutral. A bad switch prevents the light from activating.
To check the neutral switch, put the motorcycle in neutral and inspect the switch connector. Look for corrosion or loose wires. Cleaning the connector and securing the wires often fixes the problem. If the switch itself is faulty, replacement is straightforward and inexpensive.
The fuel gauge warning light looks like a gas pump icon. This light activates when your fuel level is critically low. It is a clear reminder that you need to refuel soon.
If this light stays on even after you have filled the tank, the fuel sender unit may be faulty. The sender unit measures the fuel level in the tank and sends the reading to the dashboard gauge. A malfunctioning sender gives inaccurate readings.
Another common cause is a loose or corroded connection at the fuel tank. Inspect the wiring harness connected to the fuel sender. Clean any corrosion and ensure the connector is secure.
Always take the fuel warning light seriously. Running out of fuel on the highway is dangerous and inconvenient. Keep your tank at least a quarter full, especially on longer rides.
The speedometer and tachometer lights illuminate when there is a malfunction in the gauge cluster. If your speedometer or RPM gauge goes dark or displays erratic readings, the instrument panel itself may have an issue.
Common causes include loose wiring behind the dashboard, a faulty instrument cluster, or a blown fuse. Start by checking the fuse box for any blown fuses related to the instrument cluster. Replace any blown fuses with the correct amperage.
If the fuses are fine, the problem may lie in the wiring harness behind the instrument panel. Over time, vibration and heat can cause connections to loosen. Removing the dashboard cover and inspecting the wiring often reveals the issue.
A completely dead instrument cluster may need replacement. Harley-Davidson dealerships and aftermarket suppliers carry replacement clusters. Installation is straightforward for most models and can save you significant labor costs.
The check engine light on your Harley-Davidson instrument panel is one of the most misunderstood warnings. Many riders panic when they see it, but it does not always mean disaster. This light simply indicates that the onboard diagnostics system has detected a problem.
The check engine light can be triggered by hundreds of different issues. Some are as minor as a loose gas cap. Others involve serious engine or emissions system failures. The key is to diagnose the specific cause quickly.
An OBD-II diagnostic scanner is the best tool for reading error codes. These scanners plug into the diagnostic port under your seat or near the battery. Once connected, they display specific trouble codes that pinpoint the problem area.
Do not rely solely on the check engine light to tell you everything. Use it as a starting point for further investigation. Combine it with other symptoms like unusual sounds, reduced performance, or changes in fuel economy.
When the check engine light flashes instead of staying solid, it signals a more urgent problem. A flashing light usually indicates an active misfire that could damage the catalytic converter. Pull over safely and reduce engine speed immediately.
Many dashboard light problems stem from simple electrical issues. Corroded battery terminals are the most common culprit. Over time, acid buildup and oxidation create a poor connection between the battery and electrical system. This causes erratic dashboard behavior and flickering lights.
Loose wiring connections behind the instrument panel also cause problems. Vibrations from riding can gradually loosen connectors over time. Inspect all visible wiring for frayed insulation or disconnected plugs. Reconnecting or replacing damaged wires often resolves multiple dashboard issues.
Blown fuses are another frequent cause of instrument panel malfunctions. Your Harley has multiple fuses protecting different electrical circuits. A single blown fuse can disable specific dashboard lights or the entire instrument cluster. Check your owner’s manual for the fuse box location and diagram.
Water damage is a hidden cause of electrical problems. Rain, washing your motorcycle, or riding through deep water can introduce moisture into electrical connections. Moisture causes corrosion and short circuits in sensitive dashboard electronics.
If you suspect water damage, disconnect the battery and allow the electrical system to dry completely. Use a moisture displacing spray on connectors and apply dielectric grease to prevent future corrosion. Inspect the wiring harness for any signs of water intrusion.
The Harley-Davidson instrument panel connects to several sensors and control modules throughout the motorcycle. These modules monitor engine performance, emissions, braking, and other critical systems. When a module fails, it can trigger multiple warning lights simultaneously.
The Engine Control Module (ECM) is the brain of your motorcycle’s electronic system. It processes data from all sensors and controls fuel injection, ignition timing, and emissions. A failing ECM can cause unpredictable dashboard behavior and performance issues.
The ABS Control Module manages the anti-lock braking system. It receives data from wheel speed sensors and controls brake pressure during emergency stops. A faulty ABS module triggers the ABS warning light and may disable the ABS feature entirely.
The Instrument Cluster itself contains the processor that drives all the gauges and lights. A failing cluster processor can cause lights to malfunction, gauges to display incorrectly, or the entire cluster to go dark. Replacement clusters are available from Harley dealerships and aftermarket suppliers.
Diagnosing module failures requires specialized diagnostic equipment. A basic OBD-II scanner can read some error codes. However, a Harley-Davidson-specific diagnostic tool like the Harley Diagnostic Tool (HDT) provides deeper access to module data and more accurate fault codes.
Start with the simplest fixes first when troubleshooting dashboard lights. Always check the obvious things before diving into complex repairs. A loose gas cap, a blown fuse, or a corroded battery terminal can cause multiple warning lights to appear.
Here is a simple troubleshooting sequence you can follow at home:
- Check all visible fuses and replace any that are blown.
- Inspect battery terminals for corrosion and clean them thoroughly.
- Verify that the gas cap is tight and the seal is intact.
- Check fluid levels including oil, brake fluid, and coolant.
- Inspect bulbs for burned-out turn signals and instrument lights.
- Use a diagnostic scanner to read error codes from the ECM.
- Look for loose or damaged wiring connections behind the dashboard.
Keep a basic toolkit in your garage for dashboard troubleshooting. A multimeter, a set of screwdrivers, and an OBD-II scanner cover most diagnostic needs. These tools are inexpensive and pay for themselves quickly.
A multimeter lets you test voltage at various connection points. This helps you identify whether a problem is electrical or mechanical. For example, you can test the voltage output of your alternator to confirm it is charging properly.
An OBD-II scanner is a game-changer for Harley owners. It connects to the diagnostic port and reads fault codes stored in the ECM. These codes tell you exactly which system or sensor is causing the problem. Many scanners also allow you to clear codes after completing repairs.
When a dashboard light comes on, do not panic. Follow a systematic approach to diagnosis. Start with the most common causes and work your way toward more complex issues. This methodical approach saves time and prevents unnecessary part replacements.
Sometimes dashboard light problems require professional expertise. If you have checked all the obvious causes and lights still persist, it is time to see a mechanic. A certified Harley-Davidson technician has the training and tools to diagnose complex electrical issues.
Warning signs that you need professional help include multiple lights coming on simultaneously, lights that keep returning after you clear them, and unusual behavior from the instrument cluster like flickering or dimming. These symptoms often indicate deeper electrical or module problems.
A professional diagnostic session typically costs between $100 and $300 depending on your location and the complexity of the issue. This investment can save you hundreds of dollars in misdiagnosed repairs. A technician can pinpoint the exact cause and recommend the right fix.
Always choose a mechanic who specializes in Harley-Davidson motorcycles. General motorcycle mechanics may not have the specialized software and training needed for modern Harley diagnostic systems. Dealership technicians have access to the latest Harley diagnostic tools and technical bulletins.
Regular maintenance is the best way to prevent dashboard light problems. A well-maintained motorcycle has fewer electrical issues and fewer warning lights. Follow the manufacturer’s recommended maintenance schedule and keep detailed records of all service.
Here are key maintenance tasks that help prevent instrument panel issues:
- Change your engine oil and filter at recommended intervals.
- Check and top off all fluid levels including brake fluid and coolant.
- Inspect battery terminals for corrosion and clean them regularly.
- Test your battery’s voltage and replace it every three to five years.
- Inspect all wiring connections for signs of wear or damage.
- Keep your diagnostic port clean and accessible for scanning.
- Replace burned-out bulbs promptly to prevent turn signal issues.
Washing your motorcycle properly also helps prevent electrical problems. Avoid high-pressure water sprays near electrical connectors and the instrument panel. Use a damp cloth to clean the dashboard instead of spraying water directly.
Store your Harley in a dry, covered location when possible. Moisture is one of the biggest enemies of electrical systems. A quality motorcycle cover protects against rain, humidity, and condensation that can corrode electrical connections over time.
The electrical system on your Harley-Davidson deserves special attention. The alternator, voltage regulator, and battery work together to power all electrical components including the instrument panel. When one component fails, it can affect the entire electrical system.
Have your charging system tested annually, especially before long rides or seasonal changes. A healthy alternator should produce between 13.5 and 14.5 volts at idle. If the voltage is too low, your battery will not charge properly and dashboard lights may behave erratically.
The voltage regulator controls the amount of voltage sent from the alternator to the battery. A failing regulator can send too much or too little voltage. This causes dashboard lights to dim, brighten erratically, or burn out prematurely.
Investing in quality electrical components pays off in reliability. Aftermarket parts vary widely in quality. Stick with reputable brands or OEM Harley-Davidson parts for critical electrical components. Cheap parts may save money upfront but cause problems down the road.
Riding with a well-functioning instrument panel gives you confidence on every trip. You know that your gauges are accurate and your warning system is working properly. This awareness helps you make better decisions on the road.
Experienced Harley riders develop a routine of scanning their dashboard before every ride. This quick check takes only a few seconds but catches potential problems early. Look at all the warning lights when you turn the key to the ON position. All lights should illuminate briefly and then turn off when the engine starts.
If any light stays on after startup, note which one it is. This information helps you identify and address issues before they become serious. Keeping a small notebook in your saddlebag to log warning lights and their occurrences can be invaluable for tracking recurring problems.
Stay current with Harley-Davidson recalls and service bulletins. Manufacturers sometimes issue updates that address known instrument panel issues. Your local dealer can check if your specific model year has any relevant recalls or technical service bulletins.
Joining a Harley owner community or forum is another great way to learn from other riders. Experienced owners often share tips and solutions for common dashboard problems. These communities are welcoming and full of practical advice from years of hands-on experience.
The more you understand your Harley-Davidson instrument panel lights, the safer and more confident you become as a rider. Knowledge transforms dashboard warnings from scary mysteries into actionable information. Each light tells a story about what is happening under the hood.
Take the time to learn the symbols and meanings specific to your Harley model. Your owner’s manual is the best starting resource. It contains detailed explanations of every dashboard light and recommended actions for each warning.
Keep a copy of common Harley-Davidson warning light meanings saved on your phone. This quick reference helps you act fast when a light comes on during a ride. Being prepared makes all the difference in handling dashboard warnings effectively.
Your instrument panel is your motorcycle’s communication system. It works hard to keep you informed about your bike’s condition. Treat it with respect, maintain it properly, and it will serve you well for thousands of miles.
Understanding your Harley-Davidson instrument panel lights transforms you from a passive rider into an informed one. You become capable of diagnosing problems, performing basic fixes, and knowing when to seek professional help. This knowledge is empowering and essential for every Harley owner.
Stay proactive with your motorcycle’s maintenance. Address warning lights promptly and do not let small issues become big problems. Your Harley-Davidson instrument panel lights are there to protect you. Listen to what they are saying and respond accordingly.
Every ride becomes more enjoyable when you trust your dashboard and understand its signals. The time you invest in learning about your instrument panel pays dividends in safety, reliability, and riding confidence. Your Harley is a complex machine, but understanding its warning system does not have to be complicated.
Keep this guide handy for reference. Come back to it whenever a new warning light appears or when you need a refresher on what a specific symbol means. With the knowledge in this article, you are well equipped to handle most Harley-Davidson instrument panel light challenges.
Ride safe, ride informed, and let your dashboard work for you. Your Harley-Davidson instrument panel lights are your partners in safe riding. Give them the attention they deserve and they will keep you rolling confidently mile after mile.
Can I still ride my Harley if a warning light is on?
It depends on which light is on and its color. A red light usually signals a serious problem and you should stop riding immediately. Yellow or amber lights are less urgent but still need attention soon. Check your owner’s manual to understand the severity of each specific warning light before deciding whether to continue riding.
How do I reset the check engine light on my Harley-Davidson?
You can reset the check engine light using an OBD-II scanner after fixing the underlying problem. Simply clearing the light without addressing the root cause will cause it to return. Always diagnose the specific error code first, repair the issue, and then use the scanner to clear the code and turn off the light.
Why do multiple dashboard lights come on at the same time?
Multiple lights appearing together often indicates a common electrical issue like a bad ground connection, low battery voltage, or a failing alternator. When the electrical system is unstable, it can affect multiple sensors and circuits simultaneously. Start by checking your battery and charging system when several lights come on together.
How much does it cost to repair Harley-Davidson instrument panel lights?
Costs vary widely depending on the specific problem. Simple fixes like replacing a bulb or cleaning a battery terminal cost under $50. More complex issues like replacing a faulty sensor or instrument cluster can range from $200 to $800. Always get a diagnostic before committing to a repair so you know the exact cause and cost.
Do Harley-Davidson instrument panel lights dim on purpose?
Yes, many Harley models have an automatic dimming feature that reduces dashboard brightness at night or in low-light conditions. This feature prevents dashboard glare from affecting your night vision. If your lights are dimming unexpectedly during the day, it may indicate a wiring or voltage regulator issue that needs inspection.
How often should I inspect my Harley’s instrument panel?
A quick visual inspection before every ride is ideal. This takes just a few seconds and helps you catch new warning lights early. A more thorough inspection of wiring, connections, and bulbs should be done every few months or during regular maintenance. Keeping your instrument panel clean and free of debris also helps maintain accuracy and visibility.
Key Takeaways
- Know Your Lights: Each Harley-Davidson instrument panel light serves a specific purpose and signals a different issue.
- Act Fast: Ignoring warning lights can lead to expensive repairs or dangerous riding conditions.
- DIY Fixes Work: Many dashboard light problems can be solved at home with basic tools.
- Prevention Matters: Regular maintenance keeps your instrument panel functioning properly.
- Professional Help: Some electrical issues need a certified Harley mechanic for proper diagnosis.
- Stay Informed: Knowing your motorcycle’s warning system builds confidence and safety on the road.
Frequently Asked Questions
What is Harley-Davidson Instrument Panel Lights Explained: Meanings & Fixes?
Harley-Davidson Instrument Panel Lights Explained: Meanings & Fixes is an important topic with many practical applications.