Do Window Tints Go on the Inside or Outside of Your Car
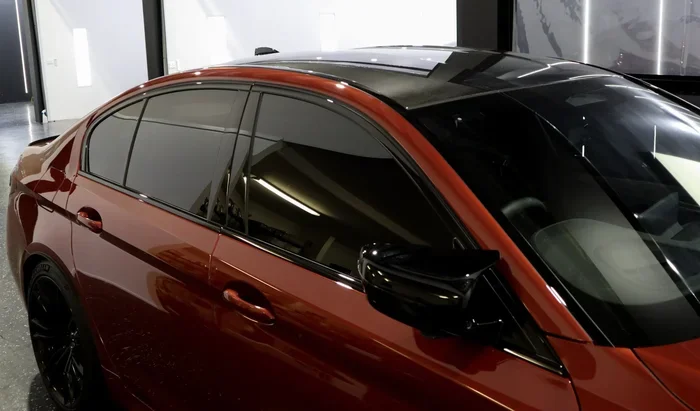
Do window tints go on the inside or outside? The answer is simple: almost all car window tints are applied to the inside of the glass. This is the standard practice for car window tinting because it protects the film from outdoor damage and ensures a cleaner, longer-lasting finish. Putting tint on the outside is rare and only happens in very specific situations.
Have you ever looked at your car windows and wondered, do window tints go on the inside or outside? It is a simple question, but the answer matters more than most people think. The side you choose affects durability, appearance, and even how well your tint performs.
Whether you are planning a DIY window tint project or hiring a professional, knowing the correct placement is step one. This guide breaks it all down in plain language. You will learn exactly where tint goes, why it goes there, and what happens when it goes on the wrong side.
By the end of this article, you will feel confident about your window tint installation. No guesswork. No confusion. Just clear, practical information you can use right away.
Key Takeaways
- Inside Placement Is Standard: Nearly all vehicle window tints are applied to the interior side of the glass for protection and durability.
- Outside Tint Exists but Is Rare: Exterior tinting is used mainly for commercial vehicles, buses, and specialty applications.
- Interior Placement Protects the Film: Keeping tint on the inside shields it from UV rays, rain, dirt, and physical damage.
- Wrong Placement Causes Problems: Tint on the wrong side can bubble, peel, scratch easily, and void your warranty.
- Professional Installation Matters: A trained technician will always know the correct side to apply your window tint film.
- Maintenance Starts with Correct Placement: Properly installed interior tint lasts 5 to 10 years with basic care.
📑 Table of Contents
- The Short Answer: Where Does Window Tint Go?
- What Happens If You Put Tint on the Outside?
- How Window Tint Is Installed Correctly
- Benefits of Interior Window Tint
- Common Mistakes to Avoid with Window Tint Placement
- How to Tell If Your Tint Was Installed Correctly
- How Long Does Interior Window Tint Last?
- Frequently Asked Questions
- Conclusion
The Short Answer: Where Does Window Tint Go?
The short answer is that window tint goes on the inside of your car. Almost every vehicle tint film is designed to be applied to the interior surface of the glass. This is true for sedans, SUVs, trucks, and vans alike.
The tint film has an adhesive side that sticks to the glass. When installed on the inside, the film faces outward. This means the colored or reflective layer is against the glass, and the protective coating faces the cabin.
There are a few exceptions. Some commercial vehicles and specialty applications use exterior tint. But for regular passenger cars, interior placement is the universal standard. If someone tells you otherwise, they are likely mistaken or referring to a very niche use case.
Why Interior Placement Is the Industry Norm
Car manufacturers and tint professionals all agree on one thing. The inside is the right side for car window tinting. Here is why this has been the standard for decades:
- Protection from the elements: Rain, snow, and dirt stay on the outside. Interior tint stays clean and dry.
- UV ray defense: The sun hits the outside of the glass first. Interior tint absorbs UV rays before they reach your skin and dashboard.
- Scratch prevention: The inside surface is less exposed to debris, branches, and accidental contact.
- Better adhesion: The adhesive bonds more effectively to clean, temperature-controlled interior glass.
- Warranty compliance: Most tint warranty policies require interior-only application.
When you understand these reasons, the logic becomes obvious. The inside placement keeps the film safe and functional for years.
What Happens If You Put Tint on the Outside?
Some people ask, “Can you put window tint on the outside?” The answer is yes, but it is not recommended for everyday vehicles. Exterior tint does exist, but it serves very different purposes.
Problems with Exterior Tint on Passenger Cars
Putting window tint film on the outside of your car creates several issues. Here are the most common ones:
- Quick scratching: The outer surface is exposed to wind, dust, and car washes. Scratches appear fast.
- Bubble formation: Heat and moisture cause the film to bubble when applied externally.
- Peeling and lifting: Adhesive struggles to bond properly on the exterior surface of curved glass.
- Fading and discoloration: Direct sun exposure breaks down the dye in the film much faster.
- Reduced lifespan: Exterior tint may last only months instead of years.
These problems are not theoretical. They happen regularly when people experiment with exterior application. The film simply was not designed to face the outside environment on a daily basis.
When Exterior Tint Makes Sense
There are a few situations where exterior tint is acceptable or even preferred:
- Commercial buses and coaches: Exterior tint helps manage solar heat on large vehicles.
- Construction vehicles: Heavy equipment windows sometimes get exterior film for worker safety.
- Temporary markings: Some businesses apply short-term exterior tint for branding or privacy.
- Specialty film types: Certain heavy-duty exterior films are built to withstand harsh conditions.
Even in these cases, the film used is different from standard automotive window tint. It is thicker, more durable, and specifically engineered for outside exposure.
How Window Tint Is Installed Correctly
Proper installation is the key to a long-lasting window tint job. Whether you do it yourself or visit a shop, the process matters. Let us walk through how professionals handle tint application the right way.
Step-by-Step Interior Installation Process
Professional installers follow a specific sequence to get the best results:
- Clean the glass thoroughly: They remove all dust, grease, and debris from the interior surface.
- Measure the window: Precise measurements ensure the film covers the entire glass area.
- Cut the film to size: The tint is trimmed to match the window shape exactly.
- Spray the glass with solution: A soapy water mixture helps position the film smoothly.
- Apply the film to the interior side: The adhesive side goes directly against the glass.
- Squeegee out bubbles and water: A squeegee pushes out all trapped moisture and air.
- Trim excess edges: Any overhang is carefully trimmed for a clean finish.
- Let it cure: The film needs time to bond fully with the glass.
Each step is important. Skipping even one can lead to tint bubbling or poor adhesion. This is why many people prefer professional window film installation over DIY methods.
DIY vs Professional Installation
You can tint your own windows, but it takes practice. Here is a quick comparison:
- DIY tint kits: Cheaper upfront, but higher risk of bubbles, dust particles, and misalignment.
- Professional installation: Costs more but delivers a cleaner, more durable finish with a tint warranty.
If you choose the DIY route, always apply the film on the interior side. Follow the kit instructions closely and work in a dust-free environment.
Benefits of Interior Window Tint
Interior tint offers a range of benefits that make it the clear choice for most car owners. Let us look at why so many people choose car window tinting for the inside of their glass.
Heat Rejection and Comfort
One of the biggest reasons people tint their windows is to reduce solar heat. Interior tint blocks a significant amount of infrared radiation. This keeps your car cooler on hot summer days.
When you walk into a parked car after a few hours in the sun, you notice the difference immediately. Interior tint makes that experience much more comfortable.
UV Protection for Your Health
Ultraviolet rays are harmful to your skin. They can cause premature aging and increase the risk of skin cancer. UV protection from interior tint blocks up to 99 percent of these rays.
Your dashboard and seats also benefit. UV rays fade and crack leather and plastic over time. Interior tint slows this damage significantly.
Glare Reduction for Safer Driving
Bright sunlight and headlights from other cars create dangerous glare. Interior glare reduction makes driving safer, especially during sunrise and sunset.
Less glare means less eye strain. You arrive at your destination feeling less tired. This is a benefit many people overlook when they first consider tinting.
Privacy and Security
Privacy film keeps prying eyes out of your vehicle. You can leave personal items on the seats without worrying about theft.
Interior tint also holds shattered glass together in the event of an accident. This adds a layer of safety for you and your passengers.
Common Mistakes to Avoid with Window Tint Placement
Even experienced car owners sometimes make mistakes when it comes to tint placement. Here are the most common errors and how to avoid them.
Mistake 1: Confusing the Adhesive Side
Every tint film has two sides. The adhesive side is the one that sticks to the glass. If you apply the film backwards, it will not bond properly. Most quality films have a protective plastic liner on the adhesive side. You peel this off before application.
Mistake 2: Applying Tint on a Dirty Surface
Dust and dirt trapped under the film cause permanent bumps and spots. Always clean the glass multiple times before starting. Use the solution provided in your tint kit or a professional-grade cleaning spray.
Mistake 3: Rushing the Curing Process
Interior tint needs time to cure fully. This process can take several days to a few weeks depending on the film type and weather conditions. Avoid rolling down your windows during this period.
Mistake 4: Ignoring Local Tint Laws
Every state and country has laws about how dark your tint can be. Some regulate the front side windows specifically. Others focus on the rear and rear window tint. Check your local regulations before applying any film.
How to Tell If Your Tint Was Installed Correctly
After your window tint is applied, you should inspect the result. Here is what to look for to confirm everything was done right.
- No visible bubbles: Small air pockets may appear at first but should disappear during curing.
- Even color distribution: The tint should look uniform across the entire window.
- No peeling edges: The film should lie flat against the glass with no lifting corners.
- Clear visibility: You should be able to see through the tint clearly from inside the car.
- Smooth texture: The surface should feel smooth, not rough or gritty.
If you notice tint peeling or persistent bubbles, contact your installer immediately. Most professionals will fix the issue under their tint warranty at no extra cost.
How Long Does Interior Window Tint Last?
The lifespan of your window tint film depends on several factors. Quality of the film, installation skill, and maintenance all play a role.
On average, interior tint lasts between 5 and 10 years. Premium films with metallic or ceramic particles can last the full 10 years or more. Budget films may start showing signs of wear after 3 to 5 years.
Here are tips to extend the life of your interior tint:
- Wait at least 48 hours before rolling down your windows.
- Use a soft cloth when cleaning the interior of your car.
- Avoid ammonia-based cleaning products on tinted windows.
- Park in the shade whenever possible to reduce heat exposure.
- Address any bubbling or peeling immediately.
With proper care, your car window tinting will continue to look great and perform well for many years.
Frequently Asked Questions
Can I apply window tint on the outside of my car?
Yes, but it is not recommended for regular passenger vehicles. Exterior tint is designed for commercial and specialty applications. For standard cars, interior placement is always the correct choice. Exterior application leads to faster wear, scratching, and bubbling.
Why does my new tint have small bubbles?
Small bubbles are normal right after installation. They are usually trapped water or air that works its way out during the curing process. If bubbles persist after two to three weeks, contact your installer for a free fix under warranty.
Does interior tint block more heat than exterior tint?
Yes, interior tint is more effective at blocking heat. The film is protected from direct weathering, so it maintains its heat-rejecting properties longer. Exterior tint degrades faster under sun exposure and loses performance over time.
How soon can I clean my windows after tinting?
Wait at least one week before cleaning your tinted windows. Use a soft microfiber cloth and an ammonia-free cleaner. Harsh chemicals and abrasive materials can damage the film and cause premature peeling.
Is DIY window tinting worth the effort?
DIY tinting can save money, but it requires patience and skill. The most common issues with DIY jobs are bubbles, dust particles, and incorrect placement. If you are a beginner, professional installation usually delivers better and longer-lasting results.
What is the difference between dyed and ceramic window tint?
Dyed tint is the most affordable option. It provides basic heat rejection and privacy. Ceramic tint is more expensive but offers superior UV protection, heat rejection, and clarity. Ceramic film does not interfere with electronic signals, making it a popular choice for modern vehicles.
Conclusion
The answer to the question do window tints go on the inside or outside of your car is clear and straightforward. For virtually all passenger vehicles, tint goes on the inside. This placement protects the film, maximizes performance, and ensures a longer lifespan.
Exterior tint has its place, but it is not meant for everyday cars. Stick with interior application and you will enjoy better heat rejection, UV protection, glare reduction, and privacy for years to come.
Whether you choose professional installation or a DIY approach, always apply your window tint to the interior surface of the glass. Take your time, follow the proper steps, and your tint will look great and perform even better. Now you have the knowledge to make the right decision for your vehicle.